
How to Flush a Feeding Tube: A Step-by-Step Guide for Parents and Caregivers

-
Key takeaways for parents and caregivers:
Flushing is one of the simplest ways to prevent feeding tube clogs
Consistent flushing supports safe delivery of nutrition, hydration, and medications
Warm water and gentle pressure work better than forceful flushing
Flushing before and after medications helps reduce residue and buildup
Regular flushing can help extend the life of your child’s feeding tube and supplies
A slow or difficult flush can be an early sign of a clog
Pausing and troubleshooting early can prevent tube damage
Making flushing part of a routine reduces stress and interruptions
Staying organized helps make tube care quicker and easier
With practice, flushing becomes a confident and manageable part of daily care
Flushing a feeding tube is a simple but essential task that keeps tube feeding running smoothly. It prevents clogs, protects the tube, and ensures your child gets the nutrition, hydration, and medications they need without interruptions. Whether you’re brand new to tube feeding or just want a refresher, mastering proper flushing can help you feel more confident and prepared in your daily routine.
This guide breaks down the why, when, and how of flushing a feeding tube, with practical tips to make the process easier and less stressful for both you and your child.
Why Flushing a Feeding Tube Matters
A feeding tube needs to stay clear and open to work properly. Over time, formula, medications, and even small amounts of residue can build up in the tube. Without regular flushing, that buildup can harden and lead to clogs.
Proper flushing helps:
Prevent clogs before they start
Ensure medications reach the stomach or intestine safely
Keep the tube clean, reducing risk of infection
Maintain comfort for the child
Extend the lifespan of the tube
For families with medically complex children, these steps can make a big difference in keeping feeding routines smooth and predictable. For more practical tips on feeding tube maintenance, read our blog “How Long Can I Reuse my Tube Feeding Supplies?”.
When Should You Flush a Feeding Tube?
Timing depends on your child’s feeding schedule and the type of tube (G-tube, GJ-tube, NG-tube, etc.), but general guidelines include:
1. Before and after every feeding
This helps clear the tube of any leftover formula and keeps it running efficiently.
2. Before and after each medication
Flushing before medication administration helps clear the path; flushing after ensures the medication fully enters the body and doesn’t mix with formula.
3. At regular intervals during continuous feeds
Most commonly, tubes are flushed every 4 hours, but your healthcare team may give different instructions.
4. Any time the tube seems slow
If the flow of formula or water seems slower than normal, or the pump alarm goes off, flushing can help check for early signs of clogging.
5. After any interruption
If a feed is paused, if your child moves around, or if the extension is disconnected, flush before restarting.
What You’ll Need
Flushing a feeding tube doesn’t require much. Gather:
A catheter-tip syringe (usually 5–60 mL depending on your child’s needs)
Warm water (never hot)
Any prescribed flush solutions if recommended by your care team
A clean towel or washcloth
Warm water works best for breaking down formula residue. Avoid using other drinks or liquids unless specifically instructed by your child’s doctor or dietitian.
Step-by-Step: How to Flush a Feeding Tube
1. Wash your hands
This small step protects your child by reducing the risk of introducing bacteria into the tube.
2. Prepare the syringe
Draw up the amount of water recommended by your healthcare provider.
Common amounts range from 3–10 mL for infants and 20–60 mL for older children and teens.
3. Clamp or pause the feeding (if applicable)
If your child is on a continuous feed, pause the pump first to avoid forcing the formula backward in the line.
4. Connect the syringe to the tube
Attach the syringe to your child’s G-tube, GJ-tube extension, or NG-tube port. Make sure the connection is secure but not overly tight.
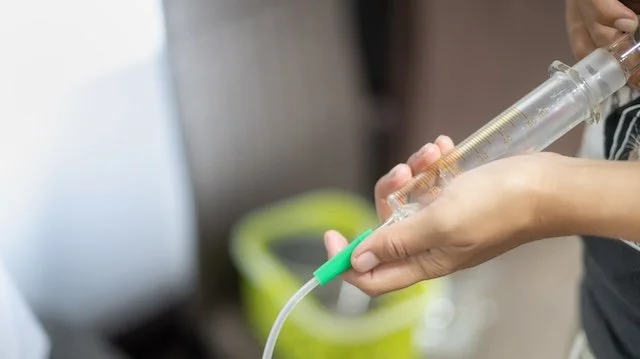
5. Gently push the water through
Slow, steady pressure works best. If you feel resistance, stop and try a slower push. Never force water into the tube.
6. Clamp or close the port
Once the water is through, clamp or close the port to prevent leakage.
7. Resume feeding or disconnect
If you’re in between feeds, you can disconnect and cap the tube. If you’re resuming a feed, restart the pump or begin the next step of your feeding routine.
8. Wash your supplies
Rinse the syringe with warm, soapy water and air-dry. Replace syringes regularly as recommended.
Tips to Make Flushing Easier
Use warm water
Warm water dissolves formula buildup better and is often more comfortable for children.
Give medications separately
Mixing medications together (or with formula) can cause crystallization and clogs. Flushing between medications is key.
Keep everything organized
A small caddy or drawer with syringes, water, extensions, and towels can make tube care quicker and less stressful.
Make it part of your routine
Pair flushing with natural transitions: before bedtime feeds, after morning medication, or when switching pump bags.
Involve your child if appropriate
Letting them help hold the syringe, count to ten, or pick a song for “flush time” can make the routine feel less medical.
What to Do If the Tube Doesn’t Flush Easily
Even with perfect technique, clogs can happen. If the tube feels stuck or the water won’t go through, try these steps:

Try a gentle push-pull motion
Pull back slightly on the plunger, then push forward slowly. This can help loosen small clogs.Use warm water only
Never try soda, juice, or anything acidic unless a medical professional advises it.Give it time
Let warm water sit in the tube for 5–10 minutes before trying again.Check the tubing for kinks
Sometimes the problem is simply a bend in the extension or tubing.Call your care team
If you’ve tried these steps and still can’t flush, contact your DME provider or nurse.
Never force water into the tube; this can cause damage or discomfort.
Flushing a feeding tube is a simple but important part of your child’s feeding routine. With the right technique, consistent timing, and a little practice, it becomes easy, efficient, and stress-free. If you ever feel unsure about the process or want a refresher, your Sentido Health team is always here to help.
**This content is for educational purposes only and does not replace medical advice. Please consult your healthcare provider for personalized guidance.**